Object Manager
Object Manager is where administrators manage the data model behind HurPal CRM: the standard objects the CRM ships with, and any custom objects your organization has added. You reach it from Settings > Object Manager.
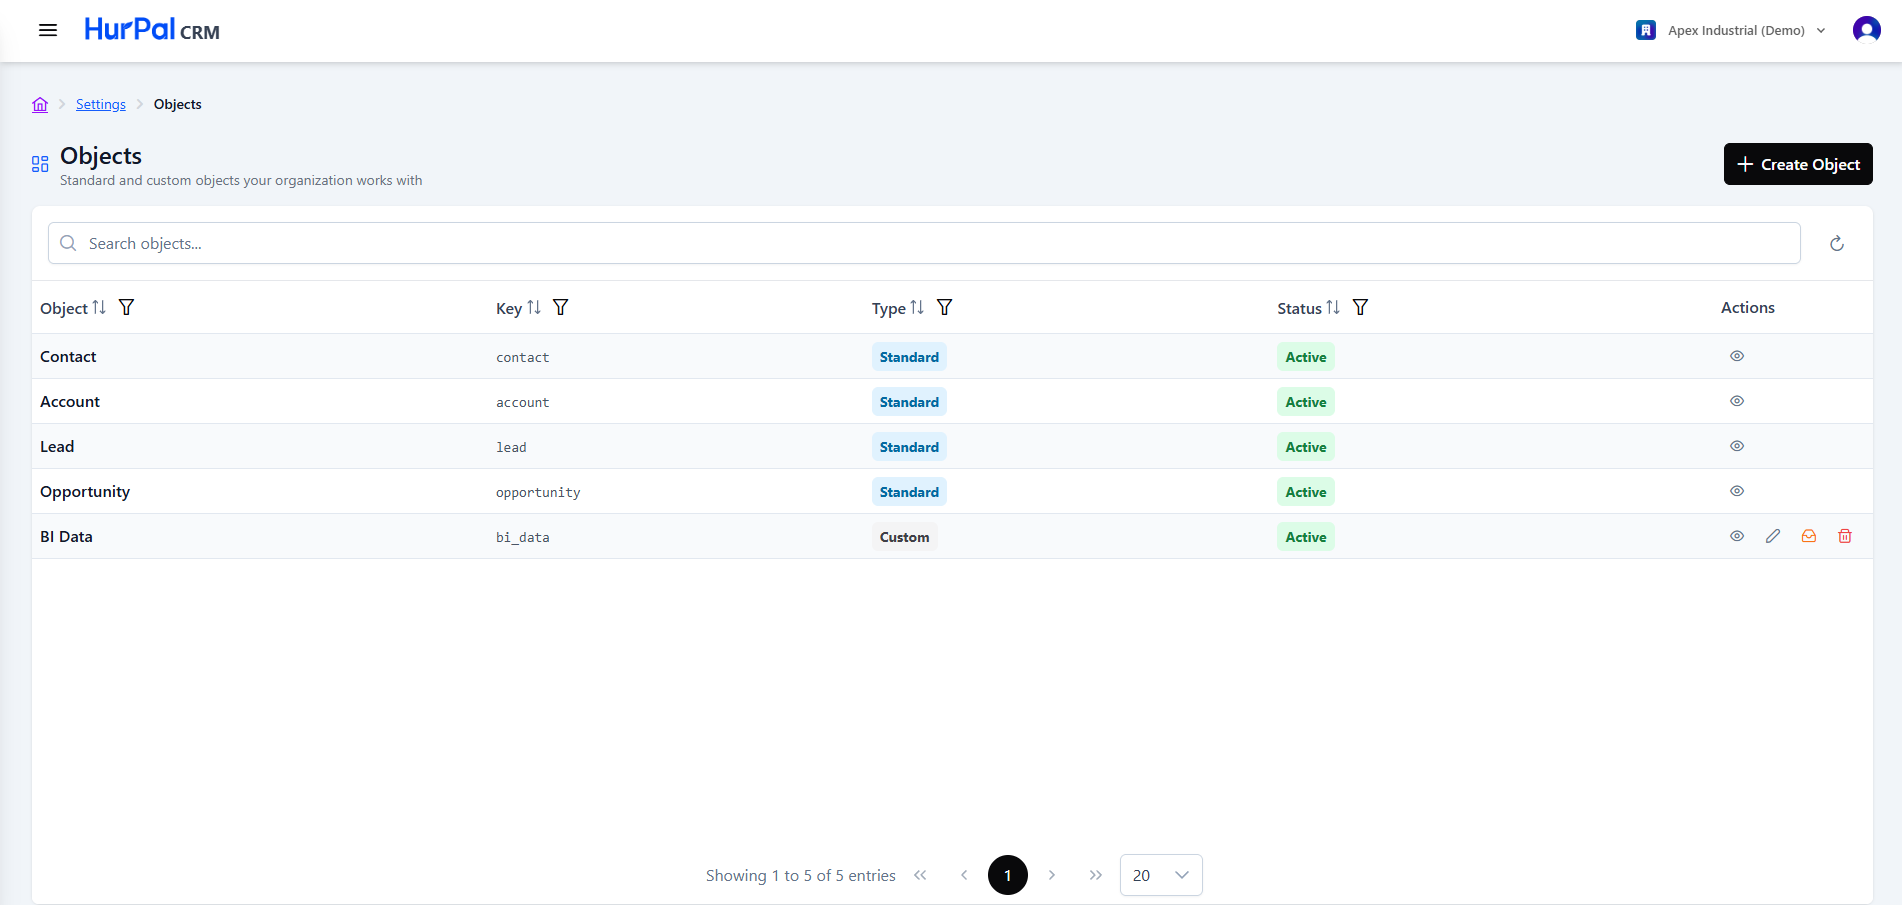
Object Manager is only visible to organization admins. If you don't see Settings in the left navigation, or don't see Object Manager under it, your account does not have admin access.
Toolbar
| Control | What it does |
|---|---|
| Search objects | Free-text search to find an object by name or key. |
| Refresh | Reloads the list with the latest data. |
| Create Object | Opens a form to define a new custom object. |
Objects table
The table lists every object available in the CRM. Each column header has its own sort control and filter.
| Column | Description |
|---|---|
| Object | The object's display name, for example Contact or Account. Click it (or use the view action) to open its detail page. |
| Key | The object's internal key, used to reference it elsewhere in the system. |
| Type | Whether the object is Standard (built into the CRM) or Custom (added by you). |
| Status | Whether the object is Active or inactive. |
| Actions | Row actions available for the object. |
Standard vs. custom objects
- Standard objects — Contact, Account, Lead, and Opportunity — are built into HurPal CRM. They can be viewed but not edited or deleted from Object Manager.
- Custom objects, such as a BI Data object your organization has added, can be viewed, edited, and deleted, and support additional actions.
Actions
| Icon | Availability | What it does |
|---|---|---|
| View (eye) | All objects | Opens the object's detail page. |
| Edit (pencil) | Custom objects only | Opens the object's definition for editing. |
| Records (inbox) | Custom objects only | Opens the records stored for that object. |
| Delete (trash) | Custom objects only | Deletes the custom object. |
Creating a custom object
Click Create Object and complete the form to define a new custom object. Once created, it appears in the objects table with a Custom type and can be managed with the full set of row actions. Open the new object to start adding custom fields on its detail page.
Object detail
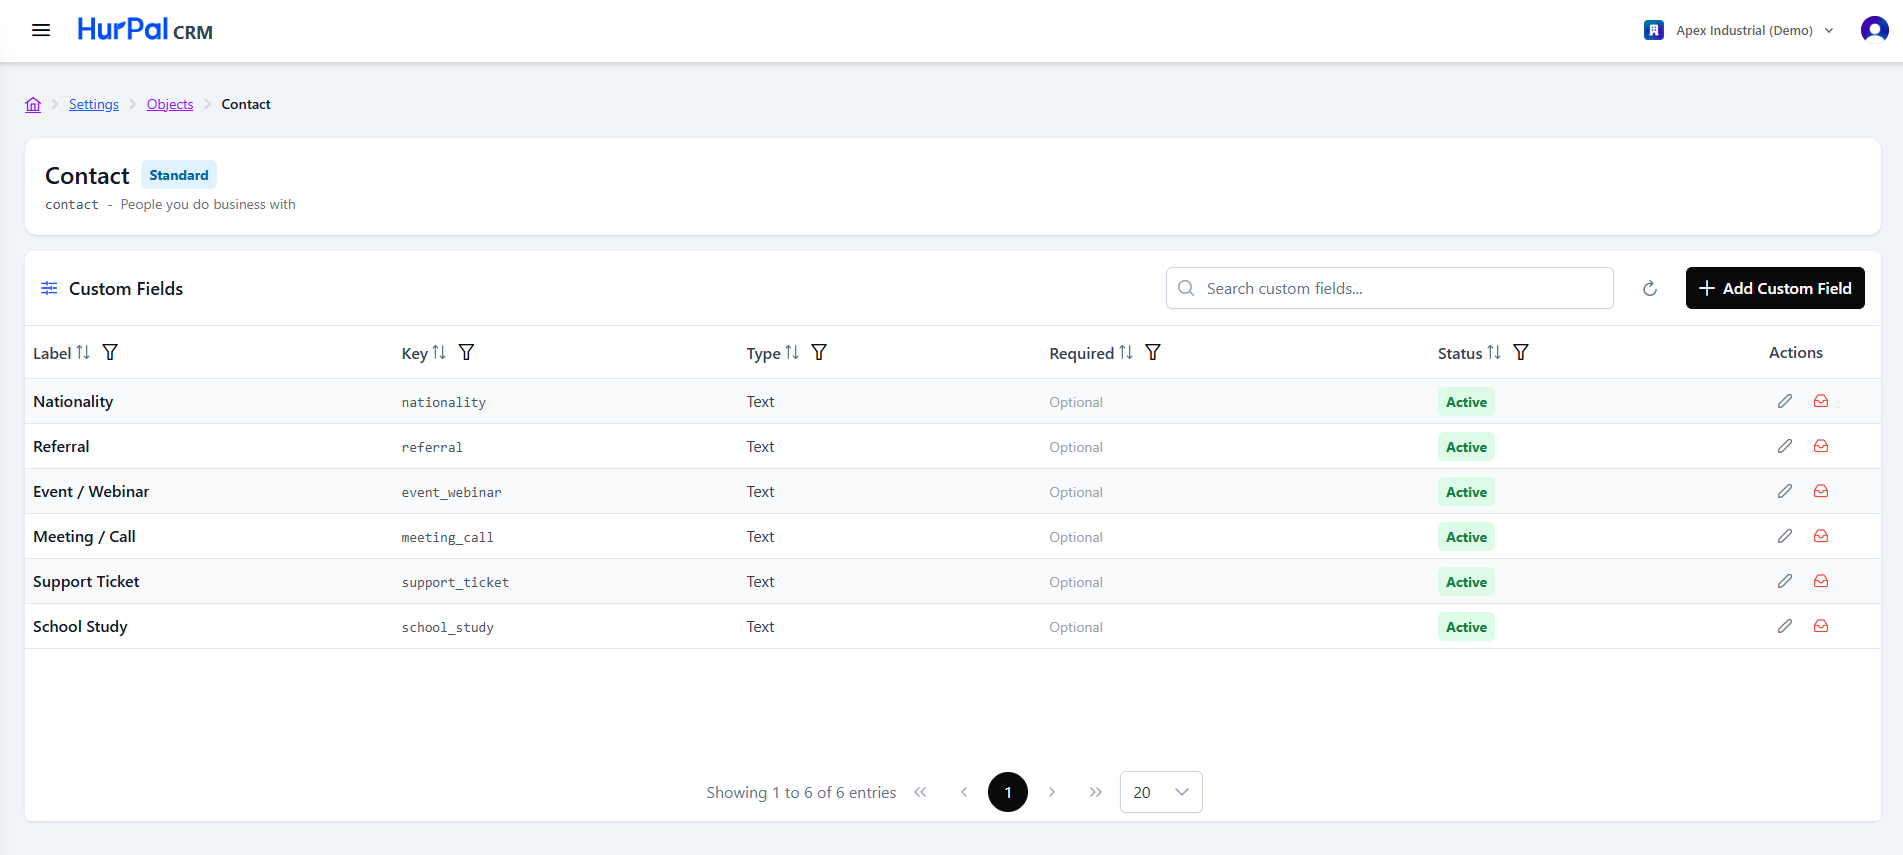
Opening an object from the objects table shows its label, its Standard or Custom tag, its key and description, and the row actions available for that object. Below that is the Custom Fields table for that object, where fields are added and managed.
Custom Fields table
| Column | Description |
|---|---|
| Label | The field's display name. |
| Key | The field's unique identifier within this object. |
| Type | Text or Number. |
| Required | Whether the field must be filled in. |
| Status | Active or Archived. |
Adding a custom field
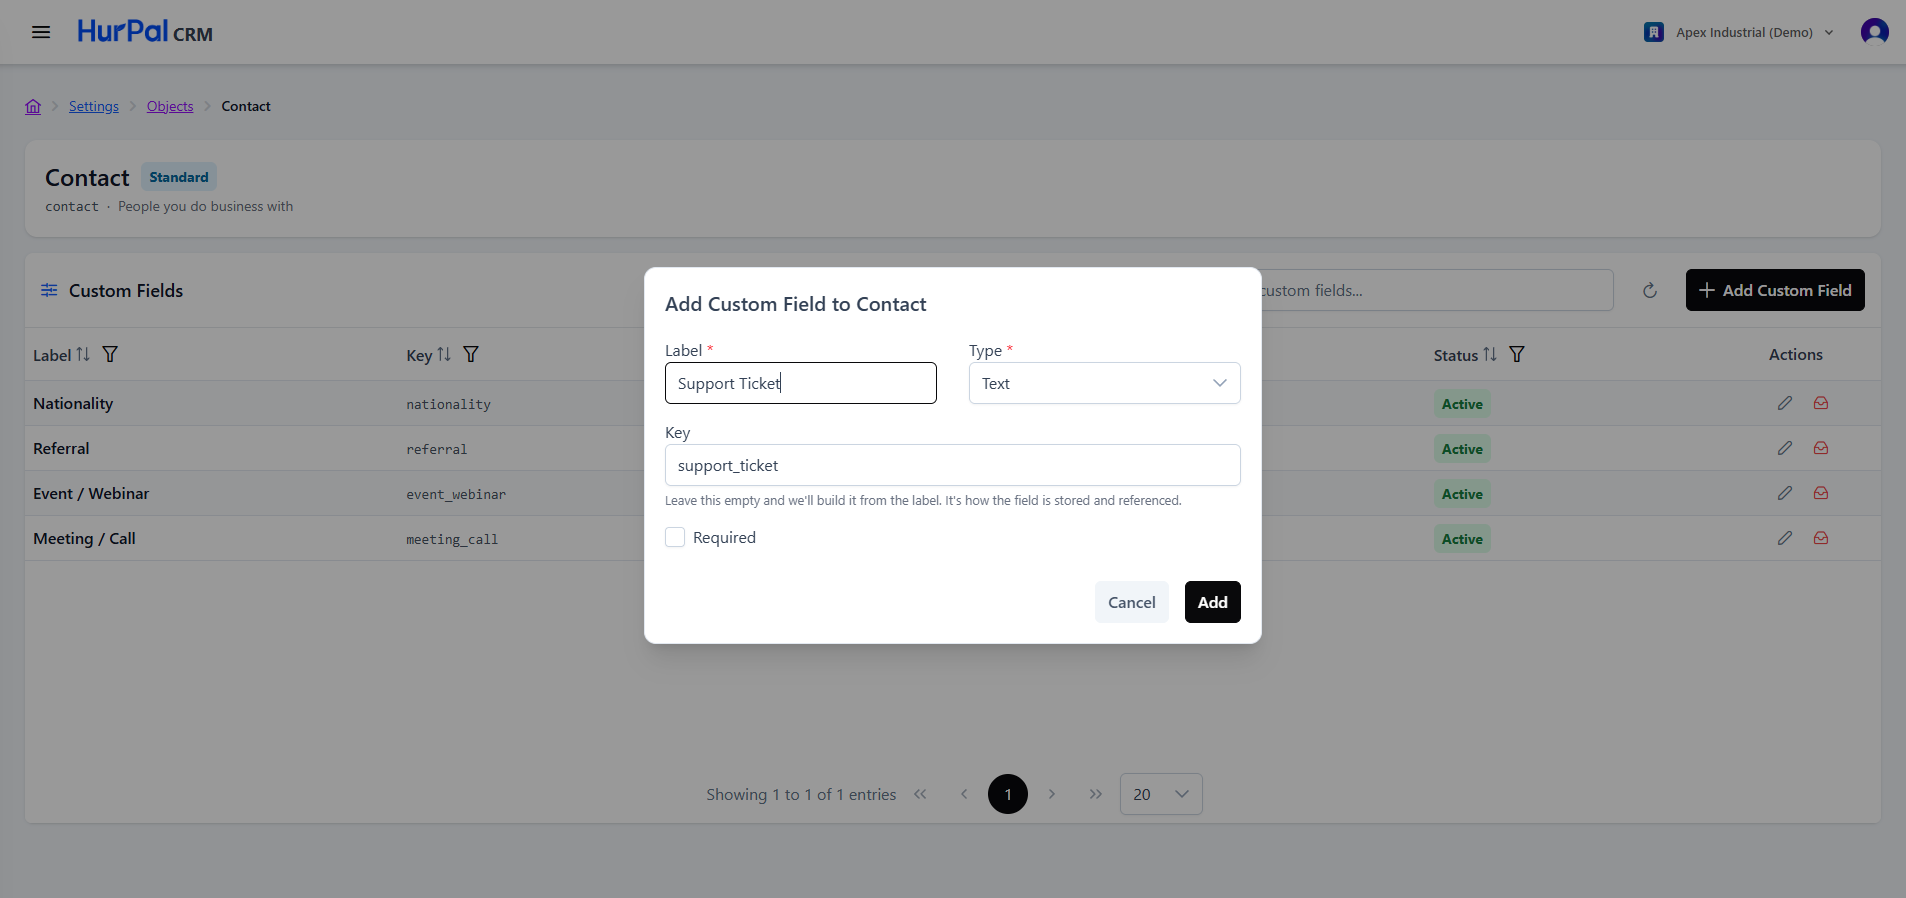
On an object that supports custom fields, click Add Custom Field.
| Field | Required | Description |
|---|---|---|
| Label | Yes | The field's display name, for example "Support Ticket". |
| Type | Yes | Text or Number. |
| Key | No | The field's identifier. Auto-generated from the label if left blank. |
| Required | No | A checkbox marking the field as mandatory. Off by default. |
Once a field is saved, its Type and Key cannot be changed. Only the Label and Required setting can be edited afterward.
Archiving a custom field
There is no permanent delete for a custom field. Archiving it hides the field from forms, lists, and filters, but any values already saved on your records are kept. An archived field can be reactivated at any time, which brings it back exactly as it was.
Custom fields on records
Custom fields you add to an object appear in a Custom Fields section on that record's detail page, alongside its other information panels. Each field is editable inline, the same way as any other field on the page. Here is a contact record with a few custom fields added:
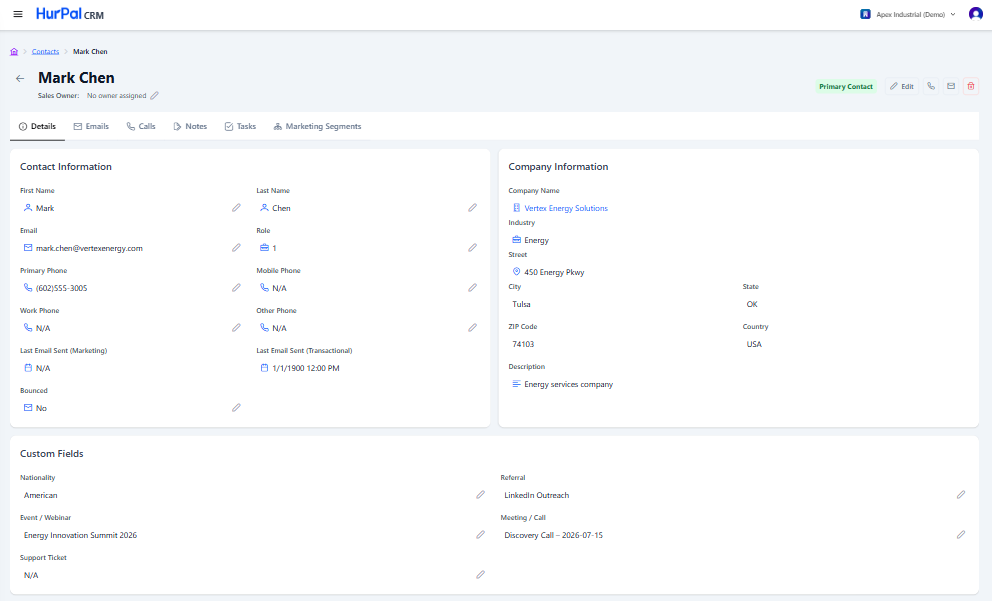
A Custom Fields section only appears once at least one active custom field exists for that object. Archiving a record's only custom field removes the section until a new one is added or the field is reactivated.